Smart+ Pro COB Lightstrip & Sensors

Setup, Pairing & Sensor Tips

1. Customize Your Lightstrip Length

Cut for shorter. Extend for longer. Keep it clean and even.

Option A

Cut for Shorter

To shorten your lightstrip, locate the labeled cuttable positions spaced every 1.2" (3 cm). Using scissors, carefully cut along one of these marked lines.

Only cut on the marked lines.
Cut point on the lightstrip
Connecting an extension to the lightstrip
Option B

Extend for Longer

To extend your lightstrip, simply connect the head of the extension (sold separately) to the end of your existing lightstrip. It’s quick and effortless.

Pro Tip: For optimal performance, keep the total length within 32.8 ft (10 m). Beyond this, you may notice a slight brightness variation between the start and end of the strip.

2. How to Install

Follow these 4 steps. Clean setup, solid hold.

Step 1

Choose Your Clip Type

Pick the option that matches your wall surface.

Nano Adhesive Clip
Best for flat, smooth surfaces (tile, glass, metal, painted walls).
Note: removing tape may lift paint.
Drill Clip
Best for textured surfaces or extra secure installs.
Tip: use anchors if you’re drilling into drywall.
Quick visual
Clip types at a glance
Nano adhesive clips vs drill clips
1. Choose Your Clip Type
Choose Your Clip Type
Pick the option that matches your wall surface.
Nano Adhesive Clip — flat, smooth surfaces
Drill Clip — textured / extra secure
Clip types at a glance
Note: Removing tape may lift paint.
2. Mark the Clips
Mark the Clips
Space clips evenly — about 9.8" (25 cm) apart.
Spacing guide
Pro Tip: Add nano stickers between clips so the strip lays flat.
3. Install the Clips
Install the Clips
Nano: Clean surface, stick clips, wait 2 hours.
Drill: Drill holes and screw clips in place.
Then snap the strip in — it should click when secure.
4. Connect to Power
Connect to Power
Connect strip → hub → power.
Connect to power

3. How to Use

Power On/Off

Press to turn your light on or off.

Color Temperature

Touch and hold the button, then release when it reaches your desired warmth or coolness.

Brightness

Touch and hold the button, then release when it reaches your preferred brightness level.

Switch Modes

Touch once to switch between:
Always-OnBreathing Light*Music Syncing

*A soft, gradual pulsing effect, ideal for creating a decorative and calming ambiance.

Pro Tip
Sync Multiple Lights
Use the Smart+ Sensor (sold separately) to control multiple Smart+ lights simultaneously.

4. How to Pair with Smart+ Sensor

Follow these two quick steps.

Step 1

Put the lightstrip in pairing mode

  1. On the PowerControl Hub, touch & hold the power button for 5 seconds.
  2. Stop when the lightstrip starts flashing.
Quick demo
Hold the hub’s power button
Step 2

Pair it to the Smart+ Sensor

  1. While the lightstrip is flashing, press and hold the “Match / Modes” button on the Smart+ Sensor (sold separately).
  2. The lightstrip will slowly flash once, then fade off — paired.
Range: Works best within 66 ft / 20 m. One sensor can pair with multiple lights — each light can only be paired to one sensor at a time.
Pro Tip: Once all lights are paired, adjust color temperature and brightness across your lights so everything works together smoothly.
Quick demo
Hold “Match / Modes”

5. How to Use the Smart+ Sensors

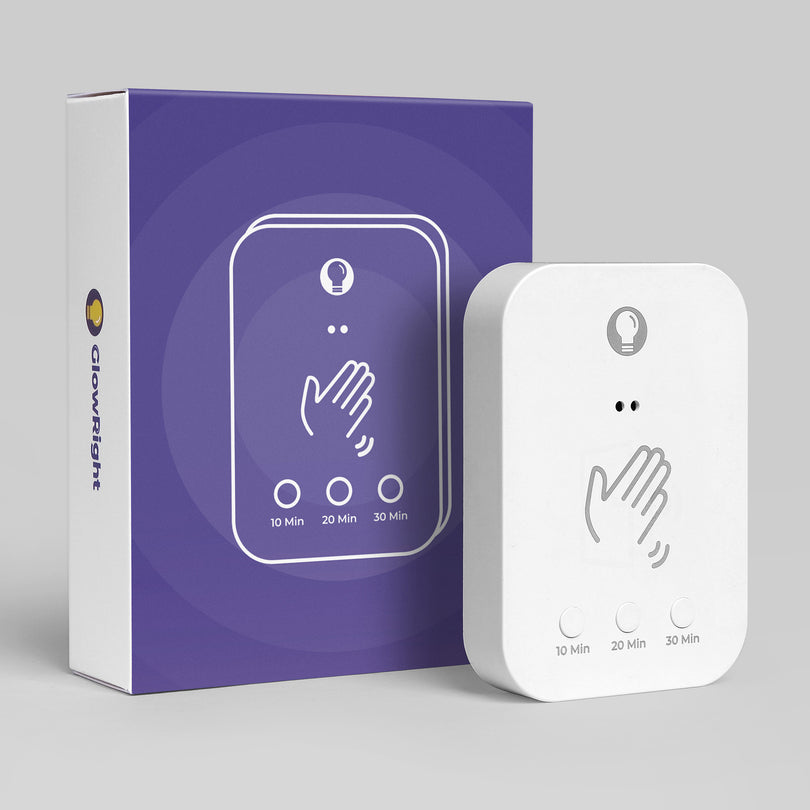
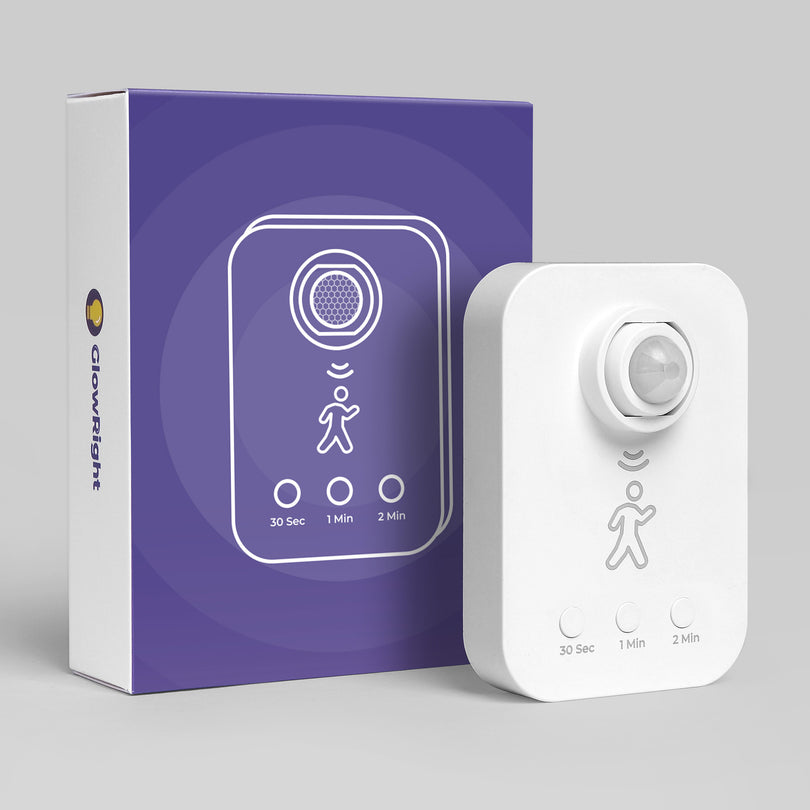
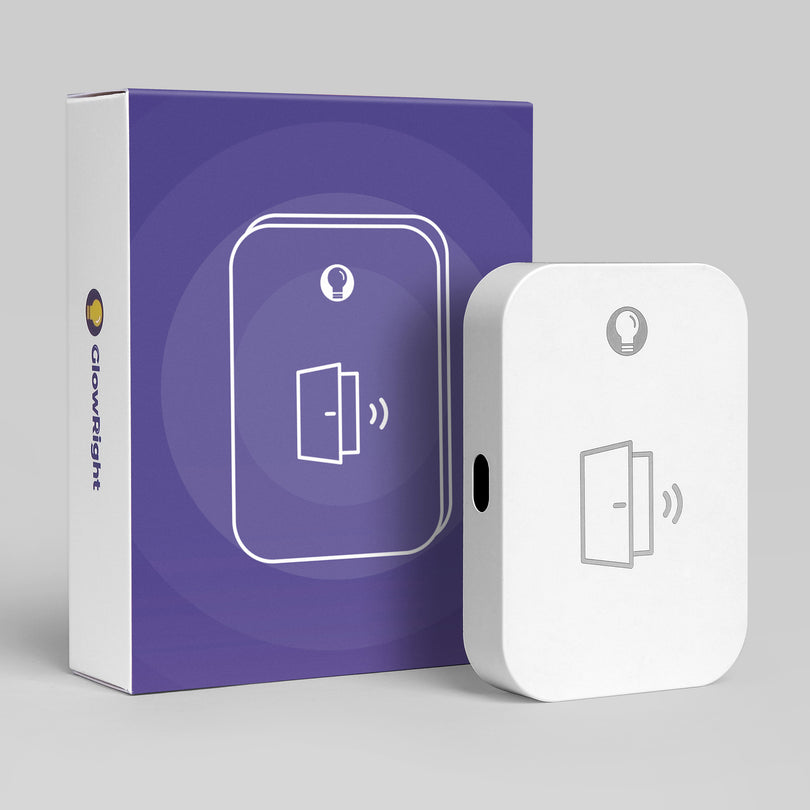
Pick your sensor below. Set the mode, then enjoy hands-free control.

Installation Tips
  • Keep sensor + lights within 66 ft / 20 m.
  • Mount 4 in / 10 cm+ above the floor (avoid signal drop).
  • Adjust the sensor head gently for best detection.
Smart+ Motion Sensor with numbered labels 1 to 4
1 Motion Duration How long it stays on after motion

Sets how long Lightstrip stays on after motion is detected.

2 Modes Auto 1 / Auto 2 / Always On / Off
Auto 1
Motion in the dark only
Flash 1×
Auto 2
Motion all day
Flash 2×
Always On
Light stays on
Flash 3×
Off
Lights off
3 Adjust Temp (tap) • Brightness (hold)
Short press
Changes color temperature
Press & hold
Adjusts brightness
4 Match / Modes Pair (hold) • Switch (press)
Hold
Pairs the sensor with a Lightstrip.
Press
Switches lighting modes: Always-On → Breathing Light* → Music Syncing.
*A soft, gradual pulsing effect, ideal for creating a decorative and calming ambiance.
Smart+ Motion Sensor
Installation Tips
  • Keep sensor + lights within 66 ft / 20 m.
  • Mount 4 in / 10 cm+ above the floor (avoid signal drop).
  • Adjust the sensor head gently for best detection.
Smart+ Motion Sensor with numbered labels 1 to 4
1 Motion Duration How long it stays on after motion

Sets how long Lightstrip stays on after motion is detected.

2 Modes Auto 1 / Auto 2 / Always On / Off
Auto 1
Motion in the dark only
Flash 1×
Auto 2
Motion all day
Flash 2×
Always On
Light stays on
Flash 3×
Off
Lights off
3 Adjust Temp (tap) • Brightness (hold)
Short press
Changes color temperature
Press & hold
Adjusts brightness
4 Match / Modes Pair (hold) • Switch (press)
Hold
Pairs the sensor with a Lightstrip.
Press
Switches lighting modes: Always-On → Breathing Light* → Music Syncing.
*A soft, gradual pulsing effect, ideal for creating a decorative and calming ambiance.
Smart+ Hand Sensor
Installation Tips
  • Sweep your hand side-to-side (left ↔ right).
  • Don’t wave toward the sensor (front/back won’t trigger well).
  • Sweep once, then wait a moment for all lights to respond.
Smart+ Hand Sensor with numbered labels 1 to 4
1 Timer One-time auto-off for the next turn-on

Sets a one-time countdown for the light to turn off after you turn it on.

2 Modes Auto / Always On / Off
Auto
Hand-sweep control
Flash 1×
Always On
Light stays on
Flash 2×
Off
Lights off
3 Adjust Temp (tap) • Brightness (hold)
Short press
Changes color temperature
Press & hold
Adjusts brightness
4 Match / Modes Pair (hold) • Switch (press)
Hold
Pairs the sensor with a Lightstrip.
Press
Switches lighting modes: Always-On → Breathing Light* → Music Syncing.
*A soft, gradual pulsing effect, ideal for creating a decorative and calming ambiance.
Smart+ Door Sensor
Installation Tips
  • The sensor is on the side of the device. Place it so the door opens away from the sensor side.
  • Keep the sensor side 0.2–0.59 in (5–15 mm) from the door when closed.
  • Avoid mounting in the middle gap of double doors.
Smart+ Door Sensor with numbered labels
1 Modes Auto / Always On / Off
Auto
Door open = on
Flash 1×
Always On
Light stays on
Flash 2×
Off
Lights off
2 Adjust Temp (tap) • Brightness (hold)
Short press
Changes color temperature
Press & hold
Adjusts brightness
3 Match / Modes Pair (hold) • Switch (press)
Hold
Pairs the sensor with a Lightstrip.
Press
Switches lighting modes: Always-On → Breathing Light* → Music Syncing.
*A soft, gradual pulsing effect, ideal for creating a decorative and calming ambiance.

6. How to Recharge the Sensors

Two indicators, one cable. Here’s what each light means.

Front Button Indicator
Sensor front view showing the button indicator
This front dot warns you when it’s time to recharge.
USB-C side Charging Indicator
Sensor side view showing the USB-C port and charging indicator
This side dot shows charging status while plugged in.
What you’ll see

Low Battery Alert

When the battery is low, the front button indicator will blink orange.

Blinking orange = please charge with a USB-C cable.
While charging

Charging Status

Solid red = charging
Solid green = fully charged

The charging indicator is the small light next to the USB-C port.

Tip: Any standard USB-C charger works (phone charger, power bank, laptop port).